Monday, September 28, 2015
Lunar Eclipse 28th Sept 2015
Wednesday, November 28, 2012
Aurora above Fochabers
The Northern Lights above Fochabers

More images can be found here http://astrosigmaguy.blogspot.co.uk
Saturday, September 22, 2012
Home Improvments
Hi folks, It been a while but I've been make a few internal improvements to the Fochabers Observatory. Had my first descent observing session the other night and it all worked better than expected.
Been doing a bit of Solar observing too today.
 Hopeing to open up tonight for a lengthy session fingers crossed the clouds stay away.
I think you'll agree that the observatory is looking good in the early autumn sunshine and not to out of place in the garden.

As I said I made a few improvements, the other night I found my eyepieces were dewing up allot so I decided to make a heated eye piece holder, from a spare vivarium heater and some wood offcuts I had lieing around.
First I nailed the heater to a blank of wood, being careful not to hit the elements which formed the base.

I then built a box around the base making a hole for the wire exit the box.
 Next was to attach a bracket to allow it to be fixed to the observatory wall. It may seem a little long but you'll see why in a moment.
 I topped the box with some tongue and groove leaving a small opening at the back to place other items in Camera lenses etc. Using a cone cutter I holed out five holes to fit my eye pieces in.
 I had space for five eyepieces in the end which is more than enough including the one in the telescope.
 Here it is all set up and ready to use in the observatory, a few screws on the bracket makes a handy storage area for some other items.
 Not bad for no cost huh? Any how it's getting dark outside time to put my thermals on and get to the eye piece.
Clear skies people.
Been doing a bit of Solar observing too today.

I think you'll agree that the observatory is looking good in the early autumn sunshine and not to out of place in the garden.

As I said I made a few improvements, the other night I found my eyepieces were dewing up allot so I decided to make a heated eye piece holder, from a spare vivarium heater and some wood offcuts I had lieing around.
First I nailed the heater to a blank of wood, being careful not to hit the elements which formed the base.

I then built a box around the base making a hole for the wire exit the box.


Clear skies people.
Wednesday, April 18, 2012
The finishing touches
I had one of my brain waves about tidying up the edges of the felt. obviously I could not fix it to sides as that would mean it would not open.

So this was solution, I fitted 6mm bolts through the original edging, made up a secondary edging to cover the opening part of the felt which is then held on by wing nuts.

This make opening the roof nice and easy, by undoing the wing nut....

.....and folding back the edging, while leaving the original edging in place.

Three of the trims just hang on the second bolt/ wing nut.

Where as the fourth I remove
completely along with cross member which is attached to it. The cross member holds down the felt overlap at the apex and is held in place by secondary edging on the opposite site.
Here's a couple of pics of the cross member in place.


and here it is being removed.

All there is then left to do is to undo the four retaining clamps inside and I'm ready to align the scope.

It only took me four minutes to open the observatory last night (including taking the photos), Which is much better than the 20 minutes that it used to take me to set up before. Happy Days!!!!!
Monday, April 9, 2012
The End is Nigh
Hi folk, well the end is in sight, I got allot more done today (Easter Bank Holiday Monday) than I thought I would. As foolish as I am I listened to the weather man, I should know better, heavy rain was forecast so I decided to have a lie in. When I surfaced at about 10:30 the Sun was shining and the sky was blue, so it was out to the observatory to do a little more.
Here's Hazel fashioning the Fochabers Observatory

Felting the roof is so much easier when it opens up as you can do the apex from inside.
Mind you I new it was going to be touch and go whether I had enough felt due to the modifications I've made, I was short by 300mm a quick dash to B&Q was in order as rain clouds started to gather. It'll be fine I thought and set off for Elgin. As I got to B&Q's car park the heavens opened and my heart sank with the thought of half the roof being ruined by the rain.
When I got home though.......
.....What, No rain?

The rain stayed off long enough for the project to be completed,
Not bad huh?

Feeling very happy with the out come of this build, every thing seems to be working as planned even the weather proofing. Just after I finished we had a sudden storm of hail and driving rain, everything inside stayed as dry as could be, Smug mode again!

I have just a few thing to tidy up now but that can be done as and when.
If you have any question about my design feel free to leave a comment and I'll get back to you.
I'll apologies now for all the cloud that we'll have for the next six months due to me having a new piece of equipment!
Clear skies everyone.
Saturday, April 7, 2012
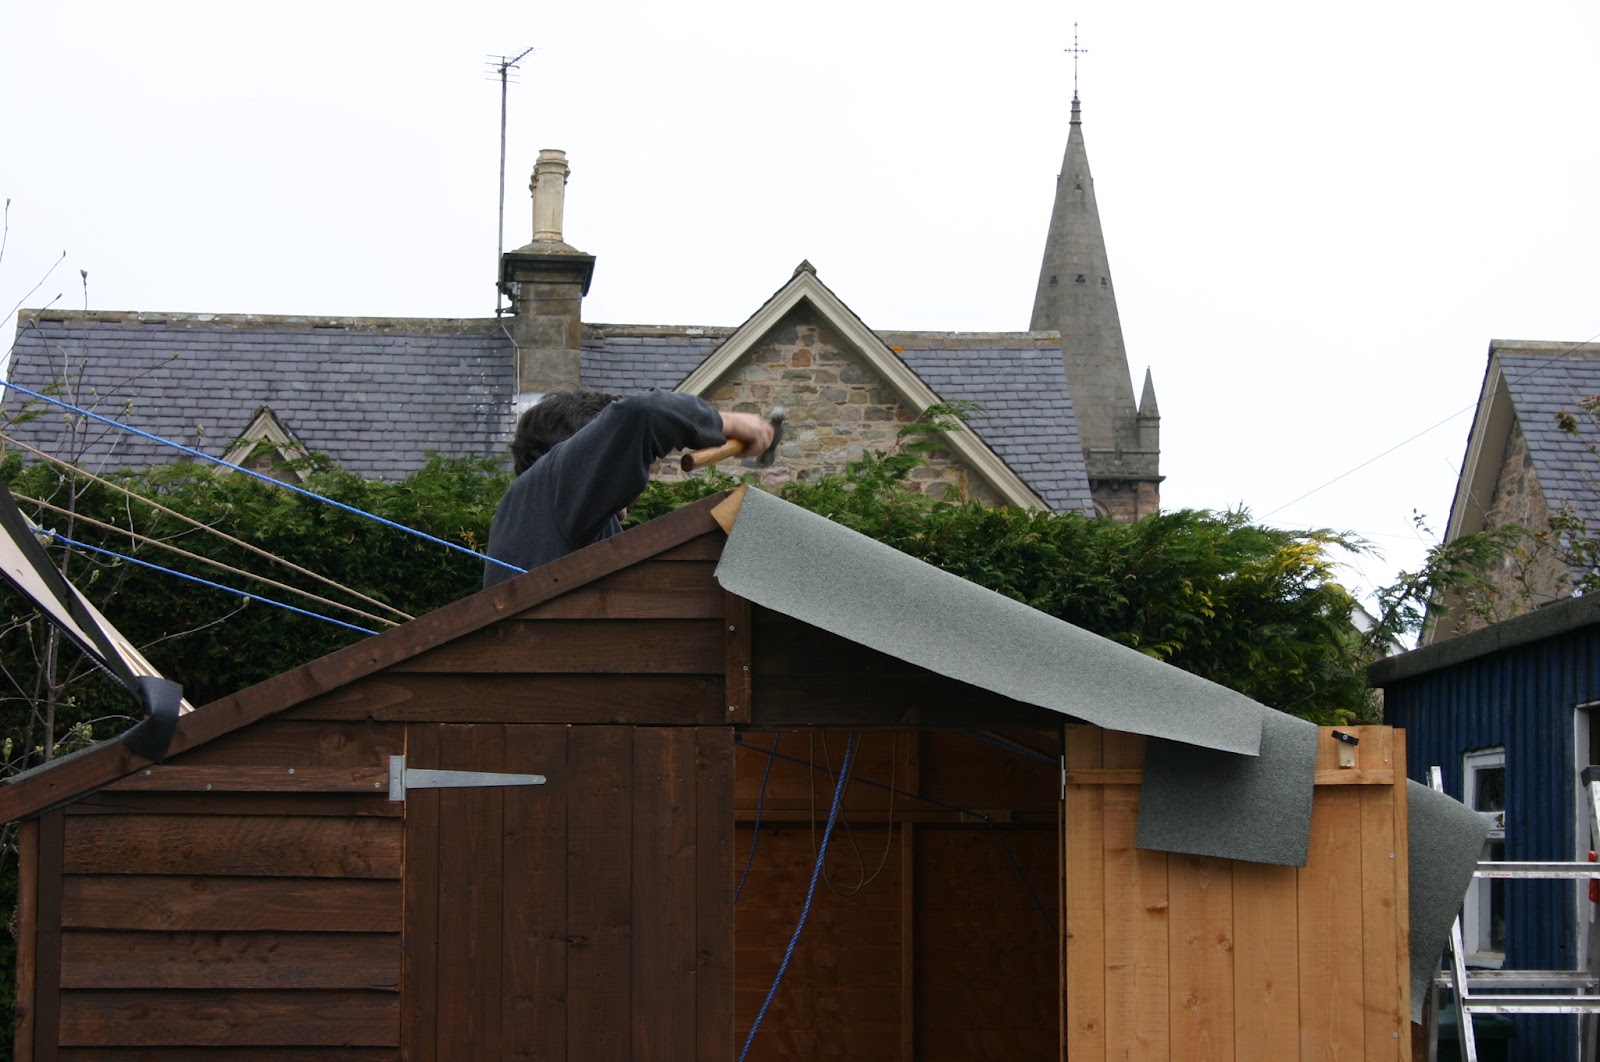
it FELT like a long day today
Well I'm halfway there, I put the roof covering on one side of the observatory today as you can see it's not your conventional just felt roof. The black strips covering the gaps is 150mm damp course membrane which is very flexible so will not rip like felt. The upper piece of felt over hangs the apex by 100mm and will lie over the top of the two section on the right hand side of the roof to stop water leaking in at the top.

The damp course has two plus sides to it.
1 it's flexible. 2 it's as cheep as chips a 30M roll cost £9 from B&Q


I used another strip of damp course to cover the vertical join, this is nailed to the left hand section underneath the felt and over laps the felt on the right hand side.
I know it's not pretty but it's practical!
I'm sure this will be sufficient for normal day to day poor weather, for server contions I'll cover the roof with a tarpaulin, SIMPLES!

Before felting the roof I strengthened hinge points with four wooden planks to ensure the screws securing them did not pull through the roof panels.
As that would be a bit of a pain if that happened!

Roof closed

Roof open.

I have a little bit of tiding up to do to the felt, time to test that half now I have left it open to the elements and thankfully it's started to rain, will see in the morning if there are any leaks.
Fingers crossed!
Saturday, March 31, 2012
Send for reinforcements
Had a very busy and productive day today, after a week long think about the observatory I decided to reinforce it from the outside as you can see from these pictures.

I fixed a piece of 2.7Mx34mmx34mm wood to the concrete base then four 1.5M uprights on each corner and then another cross piece at the top. This frame will support the weight of the roof and lower the stress on the frame of the observatory.
(Teri, there's no point trying to hide)

Time to put the roof back on for the final squaring of the building.

Screwing around again!

RIGHT! So what the hell am I going to do with this roof now?

Here's how the roof is opened and closed, you can see that the load is spread between the front and side panels. I needed to strengthen the roof at the hinge point as it's not as strong as the Norboard and will need to do the same where the hinges are screwed to the roof.

Here's the final piece of mechanics, and it works really well if I do say so myself! This locks the roof nice and tightly to the central truss and will stop it blowing open in a hooley. Only three more sections to go and then it's felting and weather proofing time.
Another day or two should see the project completed. HOPEFULLY!

Monday, March 26, 2012
First Night (Test)
Had a trip to Highland Industrial Supplies today to get some hardware Hinges/ handles/ fixings ect, Oh yes, and a new washing line for the wife as the remains of hers is incased in two tonnes of concrete!
I fitted a handle to the inside of the roof to help shut it firmly.

When I opened the roof I was greeted with this sight, LOVELY!!!!

My youngest, enjoys the views of Venus, Jupiter and the moon.

My turn!

I think there may be a queue at the eyepiece when this project is finally finished.


Sunday, March 25, 2012
Phase Three (the roof)
I seemed to been busy all day long but seemed to have got nothing done!
Done an awful lot of thinking about the roof and decided to give my idea a whirl with a small manageable piece of Norboard. I cut the board 360mm up from the eve and fitted two large hinges, screwed the lower piece to the frame of the observatory, which in fact helped to strengthen the frame by locking the side and front panels together better.
This half sized piece was easy to manage, so tried it with a full sized piece.

Here it is in place in the closed position.

And in the open potion, I've attached a length of string to the roof section and tied it to a hoop which is screwed into the other side of the front panel. This seemed to work and there was no nasty creaks of cracking noises from the frame.
I may do this roof in four sections to cut down on the overall weight plus will allow more options when observing. Yes I know this means seven joints to make water tight, but I'll get to that problem when I come to it.
The Central truss you can see in this photo may have to stay in place permanently both to allow for partial opening of the roof, as well as for keeping the structural integrate of the frame when the roof is open. This may be a bit of a pain but will be a small price to pay as the truss block out very little of the sky.

This is the view from the outside


I always knew this was going to be a project full of compromises and redesigns from the onset but so far so good.
Subscribe to:
Posts (Atom)