Hi folks,
After breakfast this morn' I doned on my overalls ready for another morning of digging out the foundations, but it was just to darn cold out there so I decided to retire indoors to do a little more planning. Well as I said previously that my design might change today I went back to the drawing board and planned the whole observatory to the millimeter and made a few changes along the way.
Firstly I've planned the foundations on the correct sizes of the shed I've ordered, and incorporated a central pier and mounting plate, (more about the pier latter)
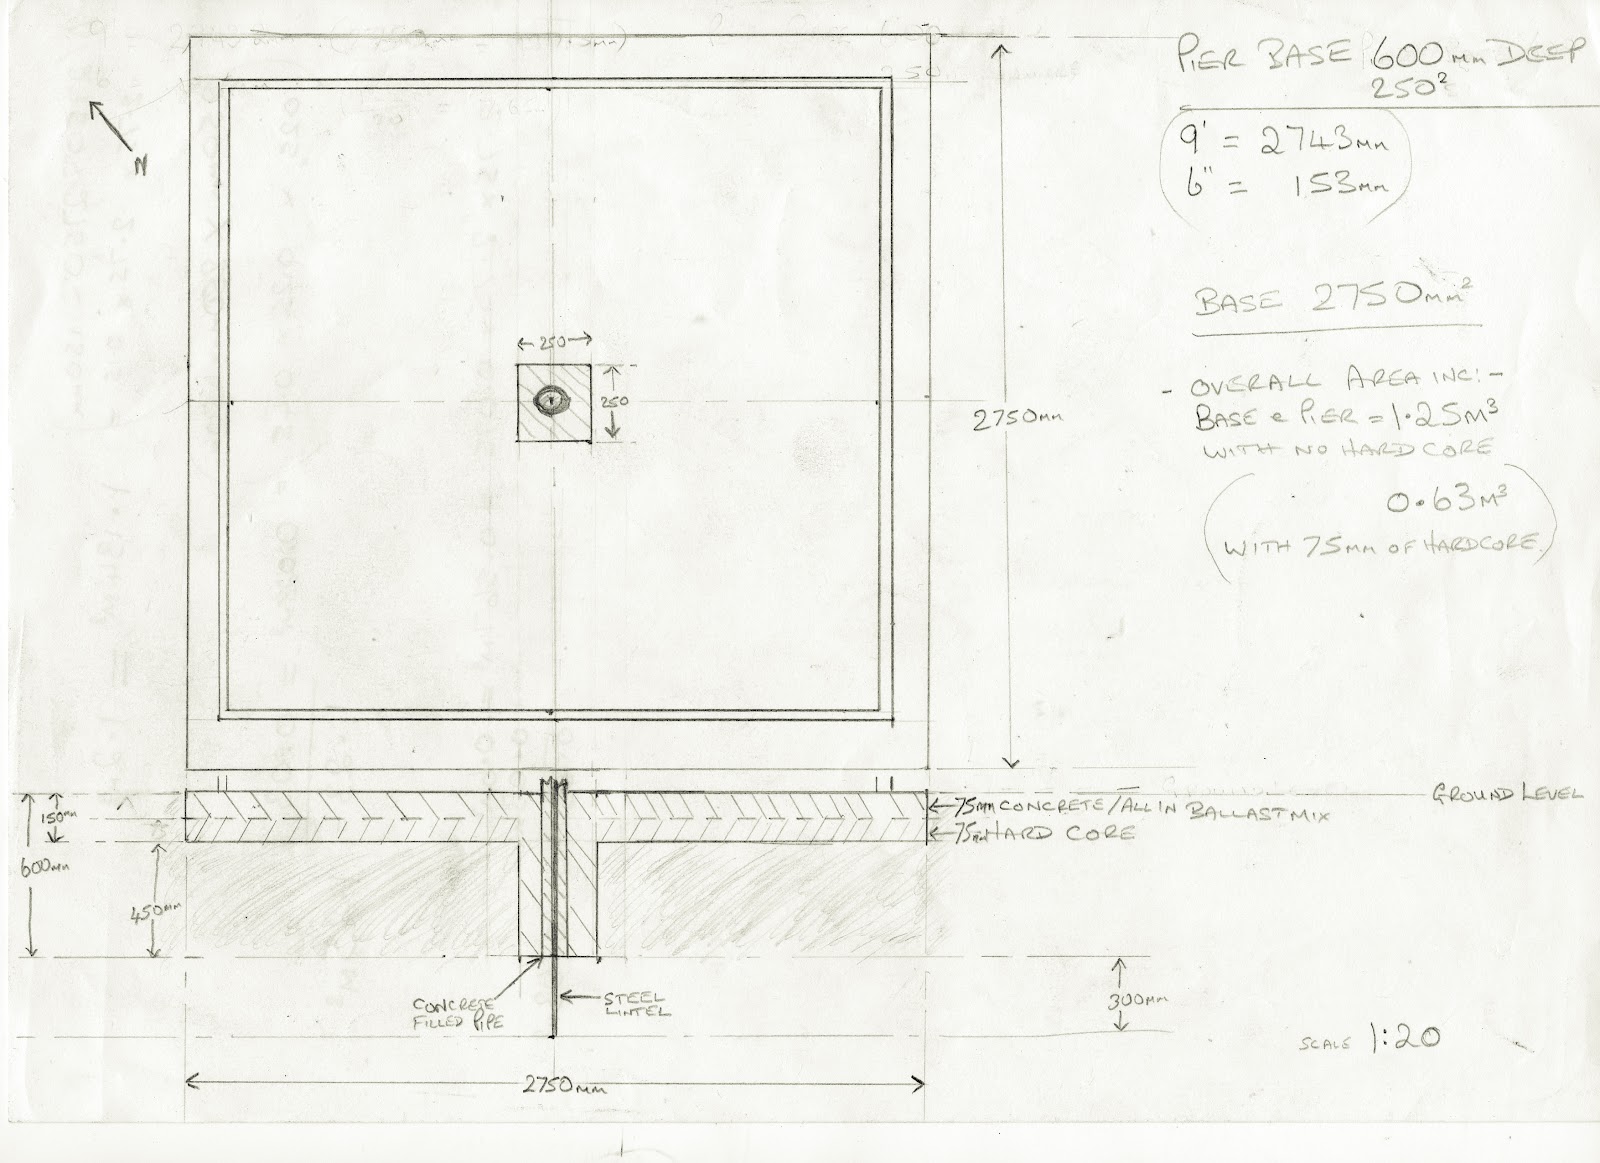
Next was to work out the internal area and space to allow for optimum operating and storage. You can see central pier I'm planning on more clearly in this blueprint, which came from an article in the sky at night magazine in 2010, just new it would come in handy one day. As I will be building the pier at the same time as the foundations the whole area of the foundations will be part of the piers' foundation and therefor should make for a very stable mount.

Here is the article from The Sky at night Magazine:

the next item on the agenda was to plan the base plate for my LXD 55 mount to attach to. This meant dismantling my mount and tripod and taking accurate measurements of mounts fixings. Like so;

As I was drawing this it suddenly hit me that this looked like some thing familiar, and something I work with everyday as a mechanic. Can you tell what it is yet??? No well let me give you a clue, take a BRAKE and look at the next illustration.

The braking surface of the disc will make a nice sized shelf for storing eyepieces and other items too just as an added bonus. I should be able to get hold of and old disc from work which when cleaned up will be fine and will cost nothing, worst case would be having to pay £40 for a pair of discs.
Next was to work out the optimum height for the pier and mount which was not to tasking a I use the approximate height of the of the tripod and mount assembly and aloud for the extra 43.5mm of the brake disc and the distance of mounting bolts.

The final step(or what I thought) was just to ensure that the over all height including the scope would allow for the roof to close. (still in two minds on the roof folding or roll off)

WHALLA! all is good, or is it?once I finished all this I had a terrible thought. Will I be able to see Polaris through my polar scope to align the mount to the polar axis? I knew the apex of the shed does not face due north but more NNE but the eave could just be to high. Back to the drawing board again to be sure.

Later people.
No comments:
Post a Comment