Now that I'm getting older I have decided to make a permanent home for my telescope. As having to lug my heavy Meade 10" Schmit Newtonian out side every time I use it is not going to get any easier in the future.

So here I'll be blogging all the trials, tribulations, successes and failures (of which there will be many I'm sure) of building an astronomical observatory from scratch.

Sunday, March 11, 2012

Concrete base done

Well the concrete base is laid, I have spent most of the weekend mixing and spreading. I'm so glad I borrowed this cement mixer from a friend as I was planning to mix the aggregate by hand, my body aches enough from loading the mixer think it would have killed me if I had chosen  the hand mixing option.


First in was the pier and mounting plate, very pleased to say that everything ended up nice and level.
I learned a very valuable lesson on Saturday about aggregate quantities that I would like to pass on to anyone who may be planning a similar venture. Work out the  quantity you need then add 60% to the total,  yes you guest it I didn't have enough All-in Ballast to do the whole base. So it was a quick dash to B&Q at 4pm on Saturday evening for ten large bags of  ballast. Surly that will be more than enough I thought, huh I thought wrong. 1.25 tonnes and ten large bags of ballast was only enough to do the pillar hole the pillar and one third of the base. Was starting to lose the light anyway at 6:30pm so decided to cover it all with the tarpoline and go to the pub for a well earned pint and a couple of wee drams.


Daddies little helper 
Sunday morning back down to B&Q I went for 20 bags of ballast and a bag of concrete, this lot tested the suspension of my Vectra estate I can tell you. (not to self, check springs and shockers in the morn)!
As you can see from this picture below I had a little help today from my daughter Hazel, she was happy moving the empty wheel barrow around but was not so keen when it was full.


I think Hazel recons she Bob the Builder here, Can we fix it?  Yes we can!


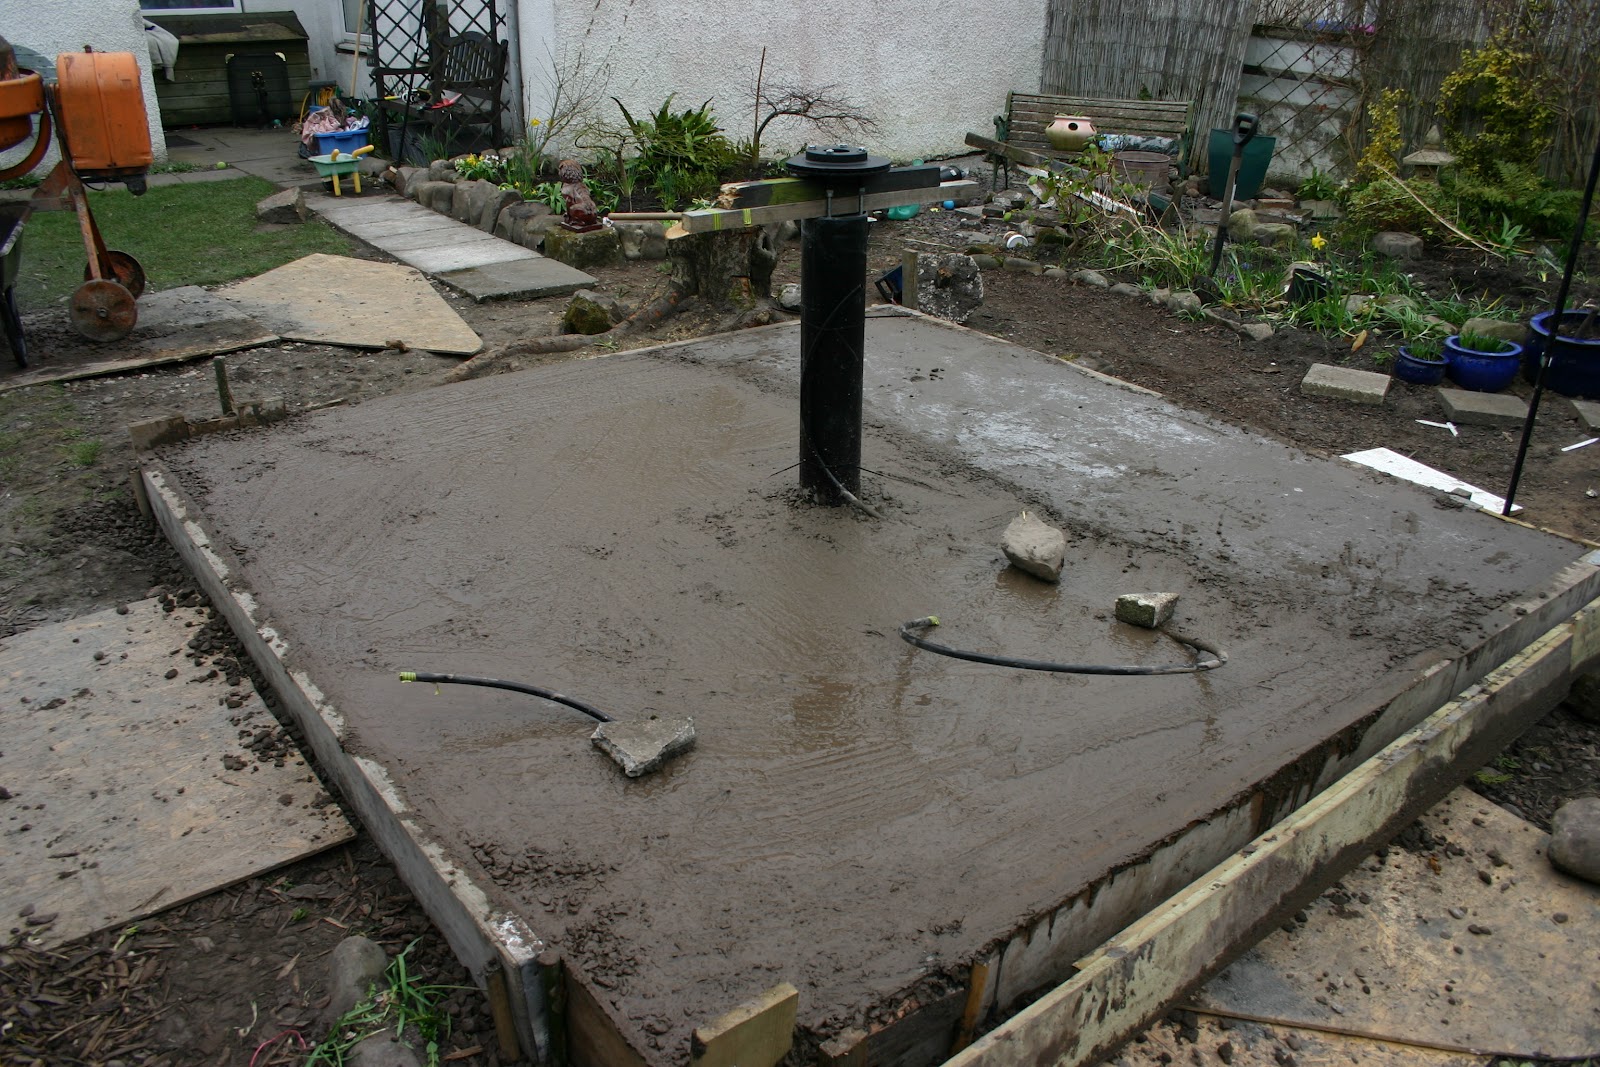
I'm very pleased with this DIY mounting as you can see I pained the soil pipe black to make it look a little less like a poop pipe and more a proper pier. 
(the wooded poles under the disc are just there to set the height of the mount and will be removed when the concrete in the pipe has fully hardened)


 All done and dusted, you can see how far I got on Saturday with the 2tonnes of ballast here not even up to the  pier, not ideal I know but these things happen.


I know allot of people advised me to cement the pier separately from the base as apparently vibrations can be transferred from the floor up the pier. I'm no going to be having a ceilidh in the observatory and will be seated at the laptop when imaging, and decided to go with my original plan of an all in one mount and base.  

I must put out a very big thank you to my wonderful wife who helped with the leveling  and for keeping the tea and coffee flowing!

2 comments:

  1. Managed to get my expansive butt in the picture then!! xx

    ReplyDelete
    Replies
    1. Ye, wide angle lens on the camera! LOL (joking)!!!!

      Delete